If you are processing a high volume of HDR photos in Lightroom Classic, the HDR Merge Batch Plugin will save you a lot of time. The plugin lets you merge multiple stacks of bracketed exposures, and process them with an HDR preset you can choose with a preview.
You can download and try the HDR Batch Plugin for free. The trial doesn't expire but adds a watermark to the batched images.
The tutorial below shows you how to use the plugin, starting with organizing your bracketed photos in Lightroom.
You can use the HDR Batch Plugin to process exposure bracketed photos, as well as individual photos. Processing bracketed photos merges the photos to HDR before applying an HDR preset. Processing individual photos just applies an HDR preset.
You can tell the plugin how many photos are in each bracket and which photos should be treated individually, by grouping your bracketed sets into Stacks. Each Stack can have a different number of exposures, and unstacked photos can be processed individually.
To group a set of bracketed photos into a Stack, select the photos, right-click and then choose:
Stacking -> Group into Stack.
However, there is an faster way to group your bracketed exposures into Stacks, which is to use Lightroom's Auto-Stack by Capture Time function. Select the photos you want to stack, then choose
Photo > Stacking > Auto-Stack by Capture Time
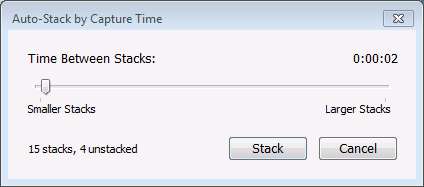
It will stack exposures based on the time they were taken. You need to give it a minimum amount of time between stacks, and around 2 seconds is probably a good value for most situations.
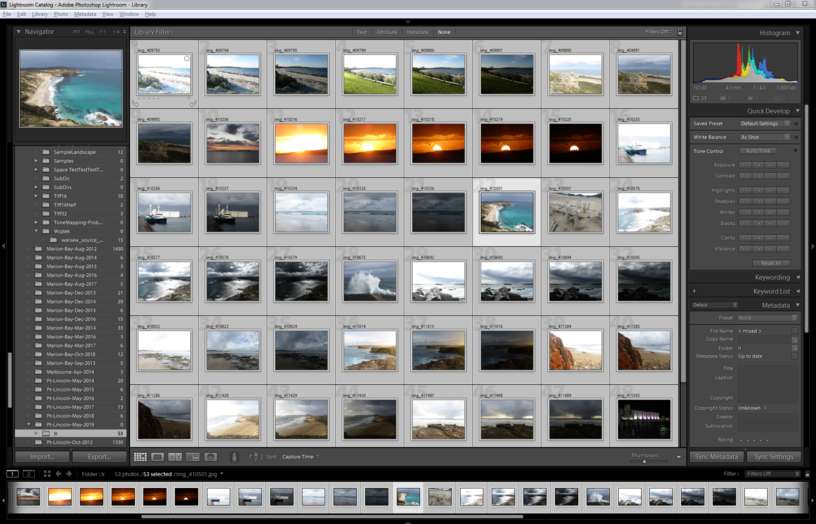
Lightroom library before auto-stacking
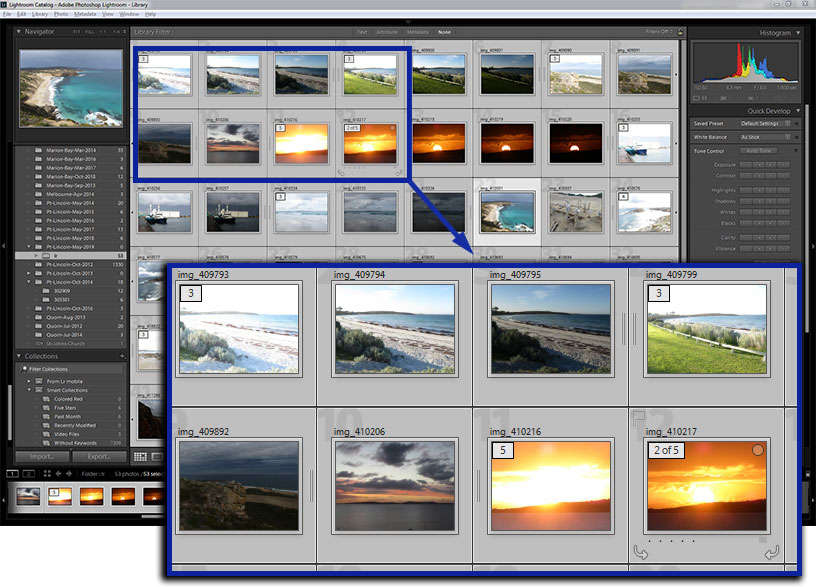
Lightroom library after auto-stacking by capture time
First, make sure you have selected all the photos you want to process, whether stacks, unstacked photos or both.
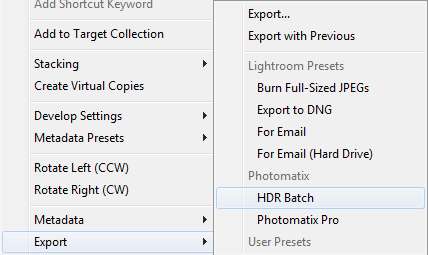
Then you can start the plugin in one of two ways:
Right-click one of the selected photos, then choose Export > HDR Batch
Or
From the main menu, choose File > Plug-in Extras > Batch with Photomatix HDR.
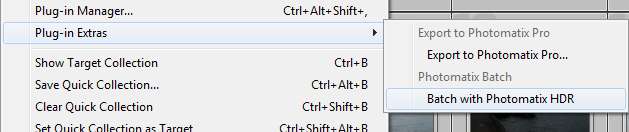
Either way brings up the Photomatix HDR Batch window.
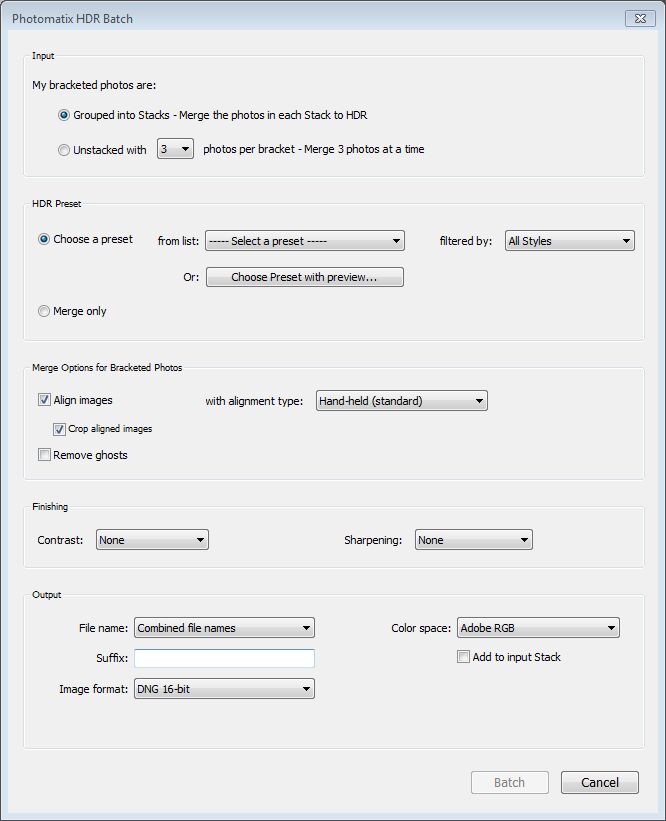
In the Input section of this window, you can leave the first option selected if you have grouped your photos into stacks. Select the second option if you haven't stacked your photos, and all your selected photos are bracketed sets.
The Plugin will work through them sequentially, taking however many you choose at a time, and processing them as bracketed sets.
You can process all of your sets using the style or look you choose, or just merge them to HDR and adjust them in Lightroom.
If you just want to merge the images, choose 'Merge only' in the HDR Preset section of the window, and skip to step 5.
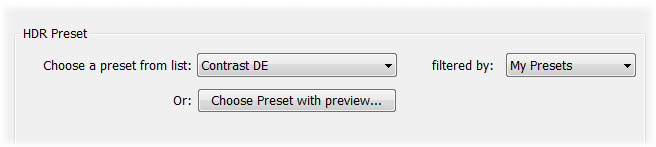
To apply a style to all of the sets, select 'Choose a preset from list' instead.
There are many different looks you can choose from, which are called Presets in the plugin. Pick one from the first drop-down list in the HDR Preset section.
You can limit the list of presets to just those with a particular style, by choosing the style from the 'filtered by' drop-down list. You can also choose to see only your custom presets by choosing 'My Presets' from this list.
Some presets use a process called fusion to merge your photos to HDR. Fusion processes bracketed sets, but not single photos. If you choose a preset that uses fusion, you'll see a warning that single photos won't be processed.
If you'd like to see previews of the presets, or adjust settings and make your own preset, click on "Choose Preset with preview". This opens a preview window using the first bracketed set in your selection.
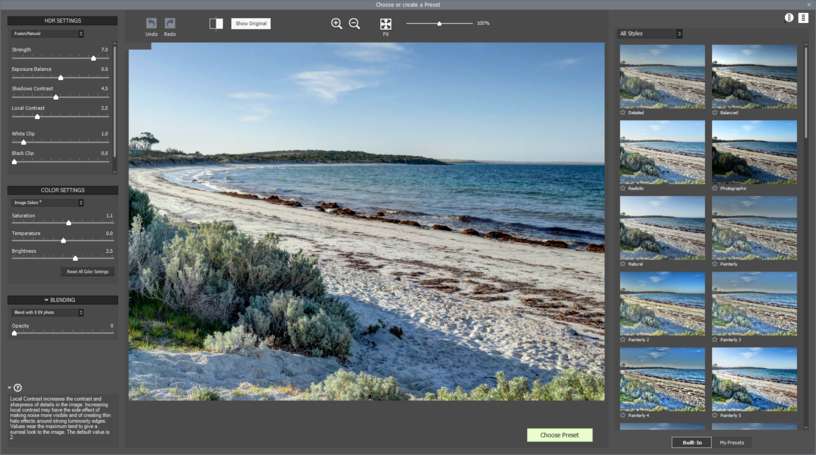
On the right hand side are thumbnails showing what each preset will look like. At the bottom you can switch between built-in presets and the ones you have created.
Clicking on a thumbnail will show its image in the main preview. If you're happy with what you see, you can click 'Choose Preset' to select that one.
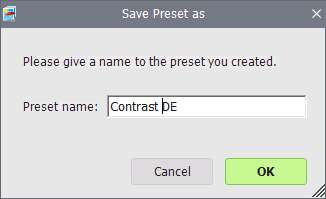
Or you can fine-tune the individual settings of a preset, using the controls on the left hand side. Once you have the look you want, click on 'Choose Preset...' to save the preset and use it for batch processing. You can use the preset again for batch processing other images later.
Saved preset selected in HDR Batch window
Before you start start the processing, you can decide whether to align the images. This is a good idea, even if you're using a tripod. If some scenes had movement between frames - for example, moving people or trees, you can select 'Remove ghosts' to try to fix this. Leave this off otherwise.
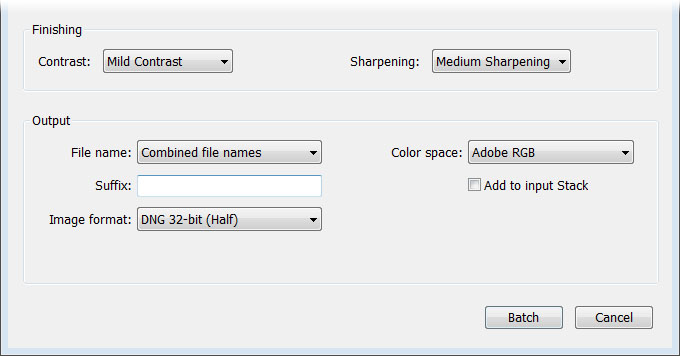
You can use the Finishing section to increase the contrast or sharpness of the merged image.
In the Output section, you can choose the way the merged images are named and what format they will be saved in, and their colour space.
If you're processing image stacks, you can have the merged images added back to each stack by ticking the box at the bottom of the window.
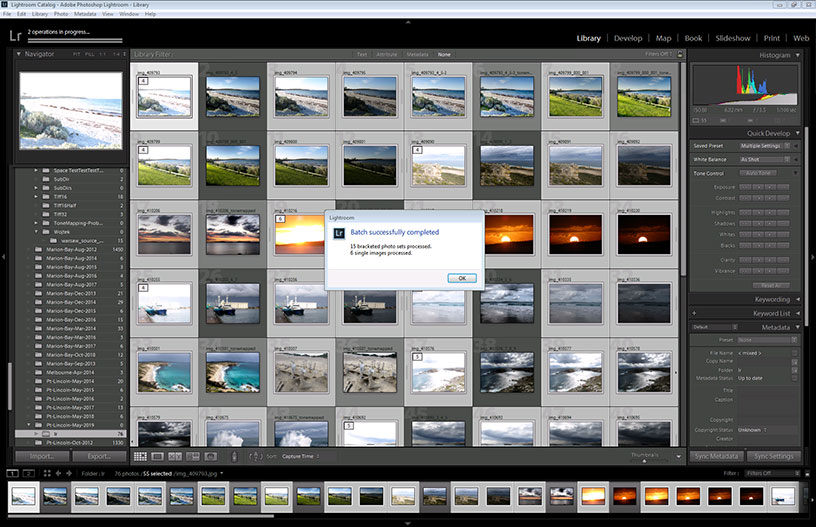
Now click on 'Batch', and Lightroom will merge your photos in the background, and import the merged images. You can keep working in Lightroom while this happens if you want, or go and enjoy a cup of coffee!
Download the HDR Batch Plugin for Lightroom and try it for free.
The trial doesn't expire but adds a watermark to the batched images.