Capturing a particularly high contrast scene, such as a room's interior with a bright view through the window, requires taking all the shots needed to capture both the darkest and brightest parts of the scene. This can sometimes be more than you'd expect!
It is particularly important that the brightest image properly exposes the darkest part of the scene. Similarly, the darkest image should properly expose the brightest area of the scene.
These steps apply to any scene with very high contrast.
Setting Up the Camera
1.
Check that the flash of your camera is switched off.
2.
Set the ISO below 400.
3.
Set your camera to Aperture priority, and set the aperture for the scene, based on the depth of field you are trying to achieve or other considerations. F/8 is often a good choice when using a wide-angle lens.
4.
Canon 5D III
Nikon D700

5.
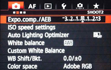
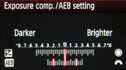
Using the AEB options, set the Exposure Increment to +/- 2 EV if your camera supports it, or otherwise to the highest it supports.
Canon 7D
Nikon D700
6.
Switch your camera to spot metering mode. Aim the camera at the darkest area of the scene and adjust the shutter speed until your camera indicates a correct exposure. This will be the shutter speed for your most overexposed photo.
7.
Aim the camera at the brightest area of the scene and adjust the shutter speed until your camera indicates a correct exposure. This will be the shutter speed for your most underexposed photo.
8.
Aim the camera at the brightest area of the scene and adjust the shutter speed until your camera indicates a correct exposure. This will be the shutter speed for your most underexposed photo.
9.
[Optional]: To check the shutter speeds you just measured, it is a good idea to take a photo for each meter reading and look at the camera’s histogram. If the histogram graph touches the left side, this indicates that there is lost shadow information. If the graph touches the right side, this indicates burned out highlights.
10.
Using the
HDR Exposure Calculator enter the shutter speeds you measured in Steps 5 and 6.
11.
Switch the camera to Manual mode and Set the Shutter Speed determined by the HDR Exposure Calculator for the first bracketed set.
12.
Take the other photos or bracketed photos determined by the HDR Exposure Calculator, if any. Note that you will need to use a tripod if you cannot cover the range with just one bracketed set.
More Details
Setting the ISO as low as you can while still maintaining a reasonable shutter speed will help ensure that your final image does not have a lot of noise in it. A nice clean image always looks so good!
It's crucial to use Aperture Priority so that the aperture does not change between bracketed shots. The focus needs to stay the same across all images to keep the merged HDR image sharp and well-aligned.
If you are shooting an average high contrast scene such as an outdoor landscape with both sunlight and shadows, there is an easier technique described in this article.