Photomatix Pro
New Features in Photomatix Pro 7
Description
Introduction to Photomatix Pro
Learn how to merge bracketed photos to HDR, apply a preset to the HDR image and use Photomatix's batch processing.
Using Photomatix Pro with Real Estate Interiors
This tutorial shows how to merge exposures of a real estate interior and create an HDR image where the room is bright and the window's view is preserved. You'll learn how to merge the exposures to HDR and select presets designed for real estate interiors.
Using Photomatix Pro from Lightroom
Learn how to use Photomatix Pro from Lightroom in simple steps. Select your photos, invoke the plugin, merge and edit the HDR image in Photomatix, and send the HDR photo back to Lightroom.
Using Photomatix Pro from Capture One
Description
Making Color Adjustments in Photomatix Pro
Learn how to use the color adjustments in Photomatix Pro to change the brightness, saturation and color temperature of the whole image, and to make changes to just part of the image using the Brush Tool. See how to make individual colors brighter or more saturated, and how to change one color into another.
Using Blending in Photomatix Pro
Learn how to use the Blend with Original function in Photomatix Pro to create images which are more natural looking. See how to blend the entire image with one of the source exposures, and how to use the brush tool to blend just part of the image.
HDR Merge Batch Plugin for Lightroom
Using the HDR Batch plugin for Lightroom
Learn how to speed up your HDR workflow in Lightroom by batch processing stacks of bracketed photos with the HDR Batch plugin.
Photomatix Essentials
Introduction to Photomatix Essentials
Learn how to load bracketed photos in Photomatix Essentials, merge the photos to HDR, adjust the HDR image to your liking, then process, crop and save it.
Real Estate Photography
Photographing a Real Estate Interior
Learn how to set up your camera to photograph a real estate interior when there is bright light coming from the windows. The video will show you a simple technique to take HDR photo and get a well lit interior image where the interior is bright and the outside view is preserved.
Using Exposure Bracketing to Photograph Interiors
Learn the pro technique to take bracketed exposures of a real estate interior with bright windows. From camera setup, to determining what exposures to use, through to taking the bracketed photos, ready for HDR merge.
Tips for Sharp Real Estate Interior Photographs
Learn how to get sharp, clear photos of real estate interiors. Find out the common causes of blurry photos and how to avoid them, with tips on choosing the right lens, good focusing technique, and keeping the camera steady.
5 Tips for Real Estate Interior Photos
Follow these 5 tips to get the best results for photographing a room interior with a bright window.
Using Photomatix Pro for Real Estate Interiors
This tutorial shows how to merge exposures of a real estate interior and create an HDR image where the room is bright and the window's view is preserved. You'll learn how to load and merge bracketed exposures in Photomatix Pro 6 and select presets designed for real estate interiors.
HDR Batch Lightroom Plugin for Real Estate Photos
Learn how to automate your real estate photos workflow in Lightroom by batch merging multiple bracketed exposure sets with the HDR Batch plugin. Select or create a style to apply to your real estate shots, then automatically blend and create HDR photos for all of your property shoot.
Setting up Automatic Exposure Bracketing
Sony
AEB setup on a Sony a7C II
Learn how to use Automatic Exposure Bracketing on the Sony a7C II mirrorless camera to shoot HDR photos ready for merging in HDR software.
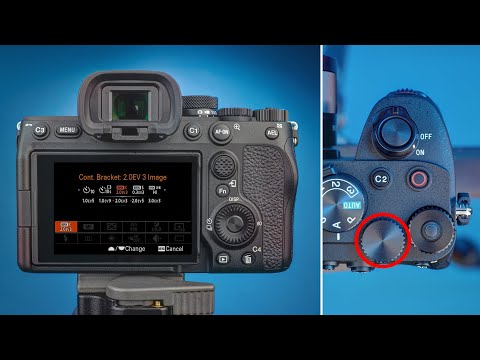
AEB setup on a Sony a7 IV
Learn how to use Automatic Exposure Bracketing on the Sony a7 IV mirrorless camera to shoot HDR photos ready for merging in HDR software.
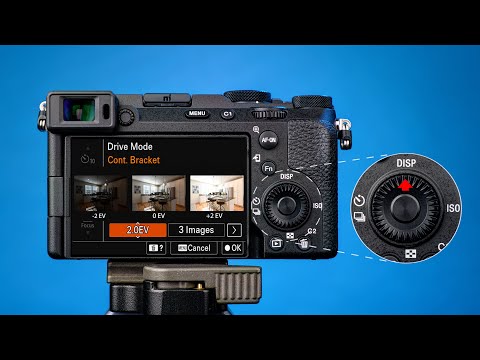
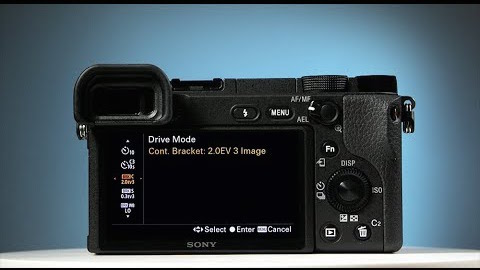
AEB setup on a Sony a6400
Learn how to use Automatic Exposure Bracketing on the Sony Alpha a6400 to shoot HDR photos ready for merging in HDR software.
AEB setup on a Sony a7R III
Learn how to select Automatic Exposure Bracketing on a Sony Alpha A7R III and take 3 bracketed photos ready for merging in HDR software.
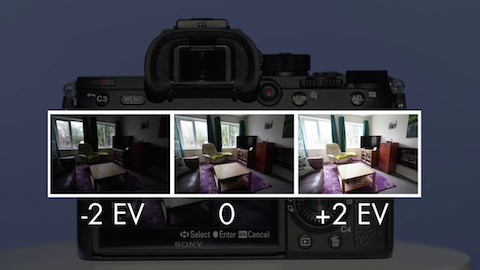
AEB setup on a Sony a6000
Learn how to select Automatic Exposure Bracketing on a Sony Alpha a6000 and take 3 bracketed photos ready for merging in HDR software.
Canon
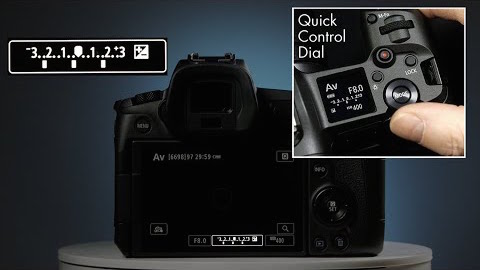
AEB setup on a Canon EOS R6
Learn how to use Automatic Exposure Bracketing on the Canon EOS R6 mirrorless camera and shoot HDR photos ready for merging in HDR software.
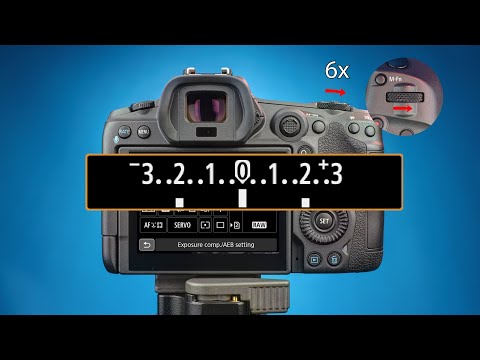
AEB setup on a Canon EOS R5
Learn how to use Automatic Exposure Bracketing on the Canon EOS R5 mirrorless camera and shoot HDR photos ready for merging in HDR software.
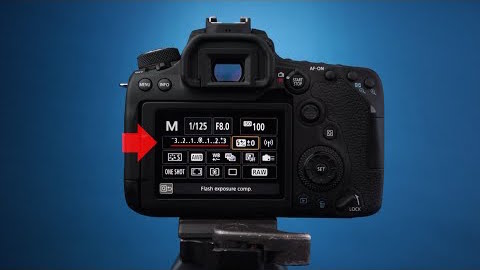
AEB setup on a Canon EOS 90D
Learn how to use Automatic Exposure Bracketing on the Canon EOS 90D and shoot HDR photos ready for merging in HDR software.
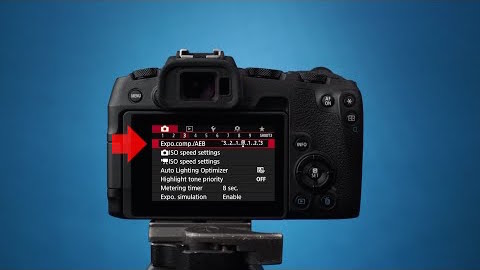
AEB setup on a Canon EOS RP
Learn how to use Automatic Exposure Bracketing on the Canon EOS RP and shoot HDR photos ready for merging in HDR software.
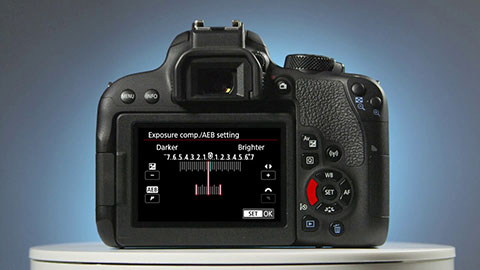
AEB setup on a Canon EOS R
Learn how to use Automatic Exposure Bracketing on the Canon EOS R mirrorless camera and shoot HDR photos ready for merging in HDR software.
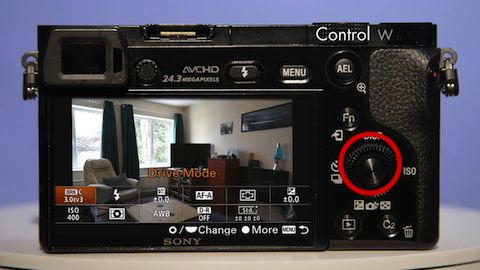
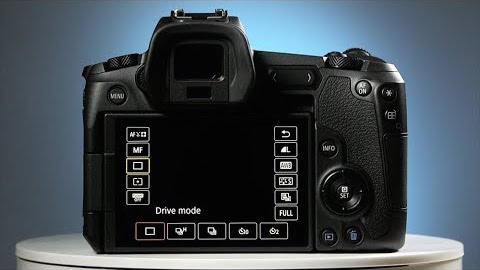
Self Timer setup for AEB on a Canon EOS R
Learn how to set the self-timer on a Canon EOS R to take automated bracketed exposures (AEB). The video shows how to navigate to the Drive Mode, choose a timer, and a quick recap on how to set AEB to take three bracketed photos.
AEB setup on a Canon 800D
Learn how to select Automatic Exposure Bracketing (AEB) on a Canon 800D and take 3 bracketed photos ready for merging in HDR software.
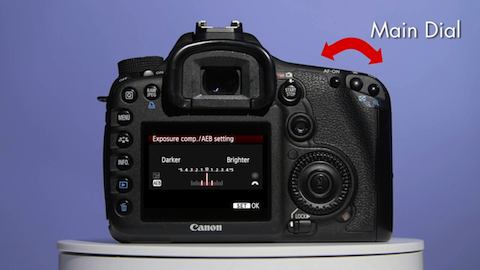
AEB setup on a Canon 7D
Learn how to select Automatic Exposure Bracketing (AEB) on a Canon 7D and take 3 bracketed photos ready for merging in HDR software.
Nikon
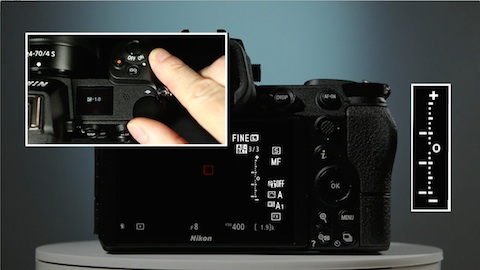
AEB setup on a Nikon Z7
Set a Nikon Z7 to Automatic Exposure Bracketing (AEB) by following these simple instructions. You will learn how to find Auto Bracketing in the Nikon Z7 menu, select the number of shots and EV step increment, set the release mode to Continuous Shooting, check the AEB set up using the exposure indicator, and take 3 bracketed photos.
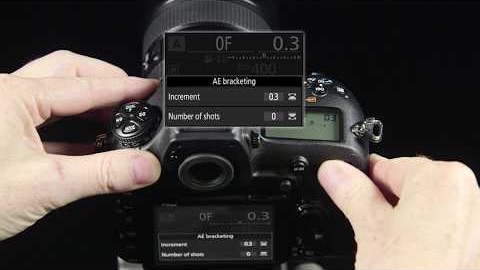
AEB setup on a Nikon D850
Set a Nikon D850 to Automatic Exposure Bracketing by following these simple step-by-step instructions. You will learn how to set AE Bracketing, select the EV step increment and take 3 bracketed photos.
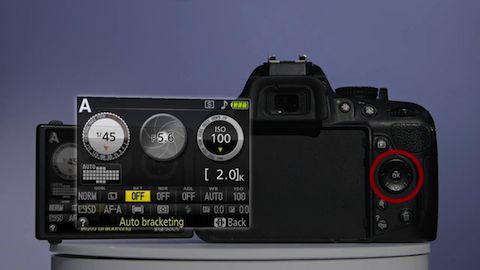
AEB setup on a Nikon D5200
Learn how to select Automatic Exposure Bracketing (AEB) on a Nikon D5200 and take 3 bracketed photos ready for merging in HDR software.
Fujifilm
AEB setup on a Fuji X-S10
Learn how to use Automatic Exposure Bracketing (AEB or AE BKT) on the Fujifilm X-S10 and shoot HDR photos ready for merging in HDR software.
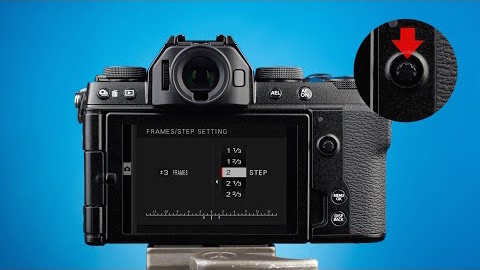
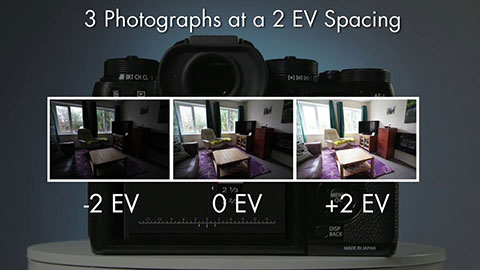
AEB setup on a Fuji X-T3
Learn how to set a Fujifilm X-T3 to Automatic Exposure Bracketing (AEB) for HDR shooting. The tutorial will show you how to set the drive dial to BKT, navigate through the Fuji X-T3 menu to find the Bracketing Settings menu, then set the number of bracketed frames and EV step spacing.
AEB setup on a Fujifilm X-T2
Learn how to select Automatic Exposure Bracketing (AEB) on a Fujifilm X-T2 and take 3 bracketed photos ready for merging in HDR software.
Panasonic
AEB setup on a Panasonic Lumix DC-G9
Learn how to select Exposure Bracketing on a Panasonic Lumix DC-G9 and take 5 bracketed photos ready for merging in HDR software.